
In a previous article, we created a Gradle project with a simple Cloud Function. Now it’s time to build and deploy it to the cloud.
Before you can deploy anything to the Google Cloud you have to set up your account. If you did that you can skip it. If not, I recommend doing all the steps described in “Before you begin” in this guide. It’s important that you installed and configured Google Cloud CLI on your computer.
Open Cloud Functions List to verify that everything is set up correctly. Your project should be selected and there should be no message about not configured payments.

Building a deployable artifact
Because deploying JVM projects from the source code and building it in the cloud supports only projects using Maven we need a different approach. We are using Gradle so we’ll build a package locally and then deploy pre-build JAR with the function.
To execute your function you need all of your runtime dependencies in the cloud, that’s why we are going to build an Uber JAR. It will embed all dependencies inside a single JAR file.
Modify your build.gradle.kts by adding a Gradle Shadow plugin:
plugins {
    id("com.github.johnrengelman.shadow") version "8.1.1"
    id("org.jetbrains.kotlin.jvm") version "1.9.21"
    `java-library`
}
Now you can build an Uber JAR using shadowJar task. Under /build/libs you will find an Uber JAR with a suffix -all.jar
./gradlew shadowJarDeploy the function
You have two options: you can upload a function manually or deploy it using Cloud CLI. The latter option is more interesting because you are going to deploy your functions frequently. But first, you need to check that Cloud CLI works correctly using the list command. Also, make sure that you have selected the correct Google Cloud project.
➜  function-hello-world gcloud functions list
Listed 0 items.
Now you can run deploy command. But because this command needs many arguments let’s create a script that will deploy the function
#!/bin/zsh
gcloud functions deploy function-hello-world \
  --gen2 \
  --region=europe-north1 \
  --entry-point=com.kamilhalicki.HelloWorldFunction \
  --runtime=java17 \
  --trigger-http \
  --allow-unauthenticated \
  --source=build/libs/
You can change the region and other parameters that suit you. Make sure that under the source directory is only one .jar file (Uber JAR), otherwise command will fail.
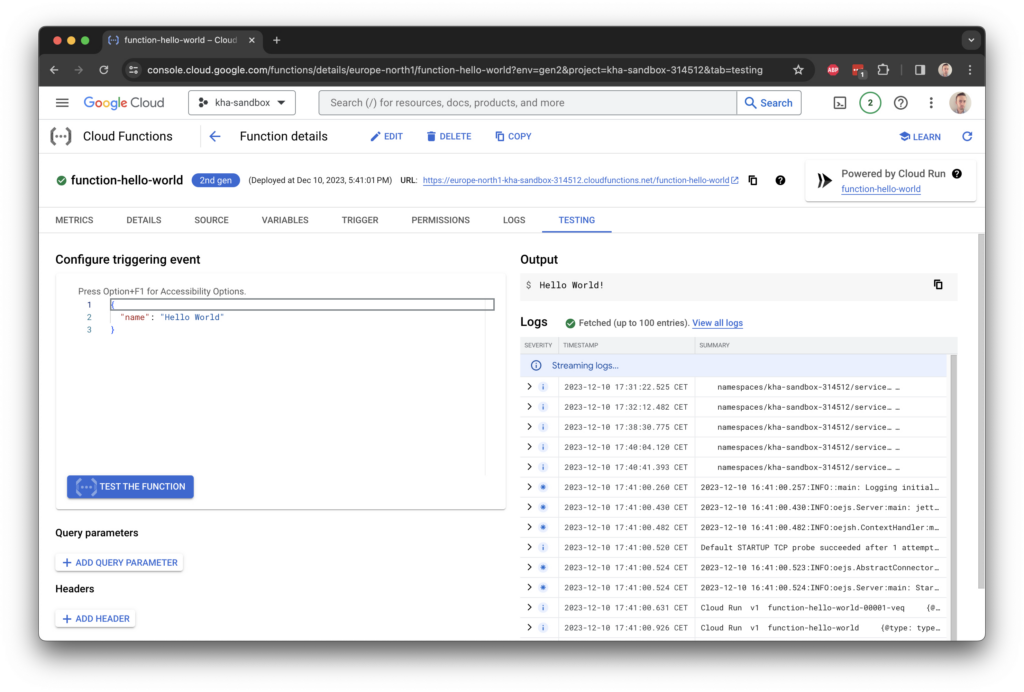
After a while, the function will be deployed and you can check that using the gcloud functions list command or using Cloud Functions web UI. The second option also allows one to check metrics and logs so probably is more convenient.
Hi just wanted to give you a quick heads up and let you know a few of the images aren’t loading correctly. I’m not sure why but I think its a linking issue. I’ve tried it in two different internet browsers and both show the same results.
Hey There. I discovered your blog the use of msn. This is a very well written article. I will make sure to bookmark it and come back to read extra of your helpful information. Thanks for the post. I will definitely return.
I think this is one of the most significant info for me. And i’m glad reading your article. But want to remark on few general things, The site style is wonderful, the articles is really excellent : D. Good job, cheers